
Release Notes - [09/08/2026]
🚀 New Features- Default Distribution Lists
- Optimized the queries powering open jobs and all jobs, reducing load times on the Homepage and Job Vault
- Fixed a bug causing casing tally imports to fail when certain characters were included in the import template
- Fixed a bug preventing a user’s full name from being updated on the Administration page
- Fixed a bug causing an error intermittantly when editing a casing record that had no cementing record present
- Improved error messaging when importing surveys, casing tallies, perforations, or stimulations using an incorrect template
- Certain non ASCII special characters in a document’s description no longer cause upload failures — a warning is now shown before upload instead
Default Distribution Lists
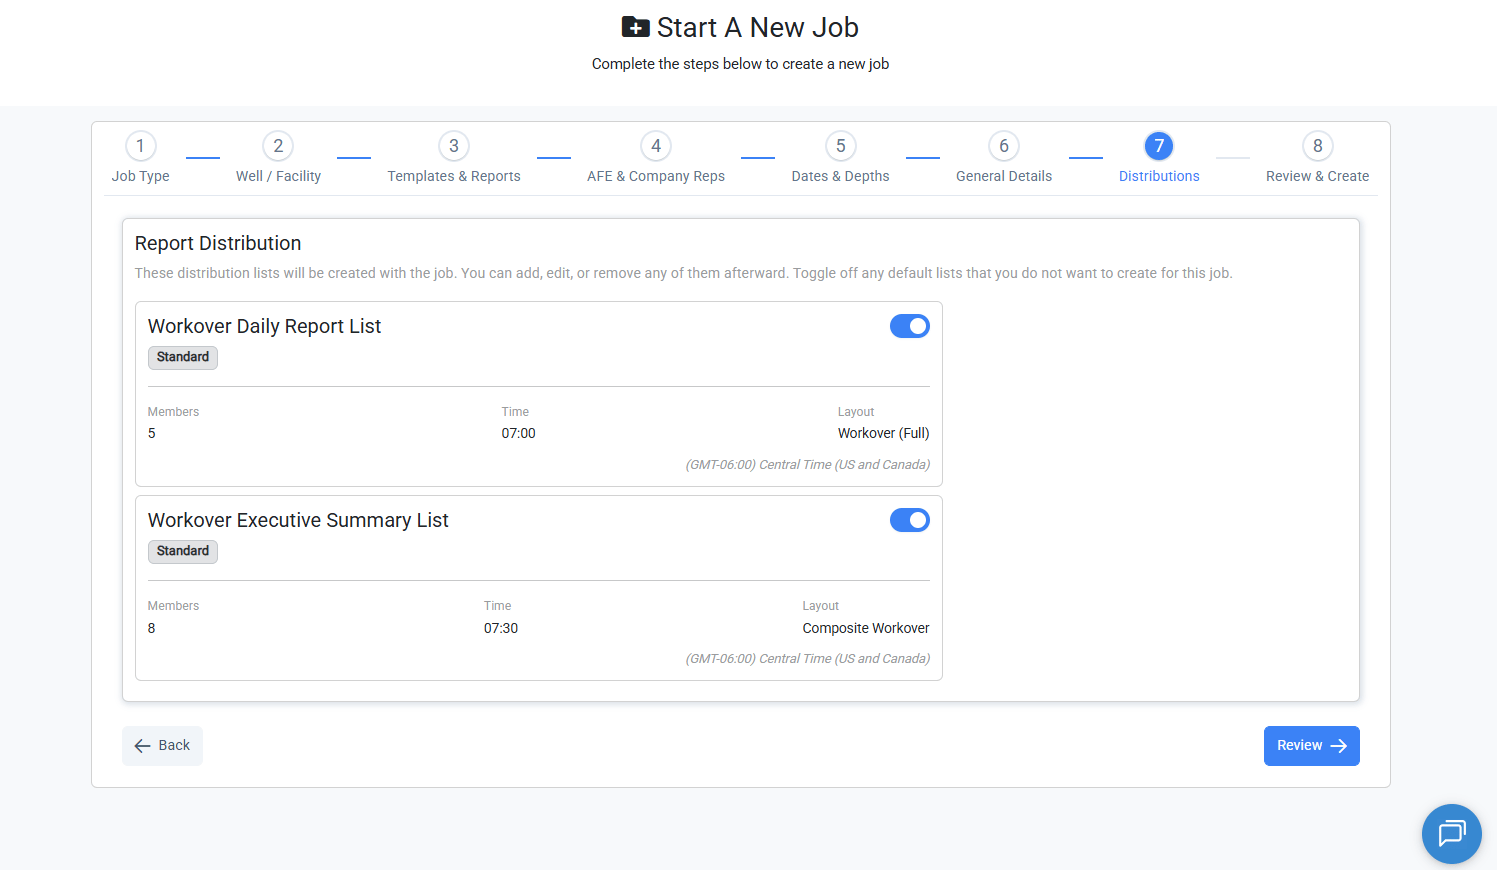
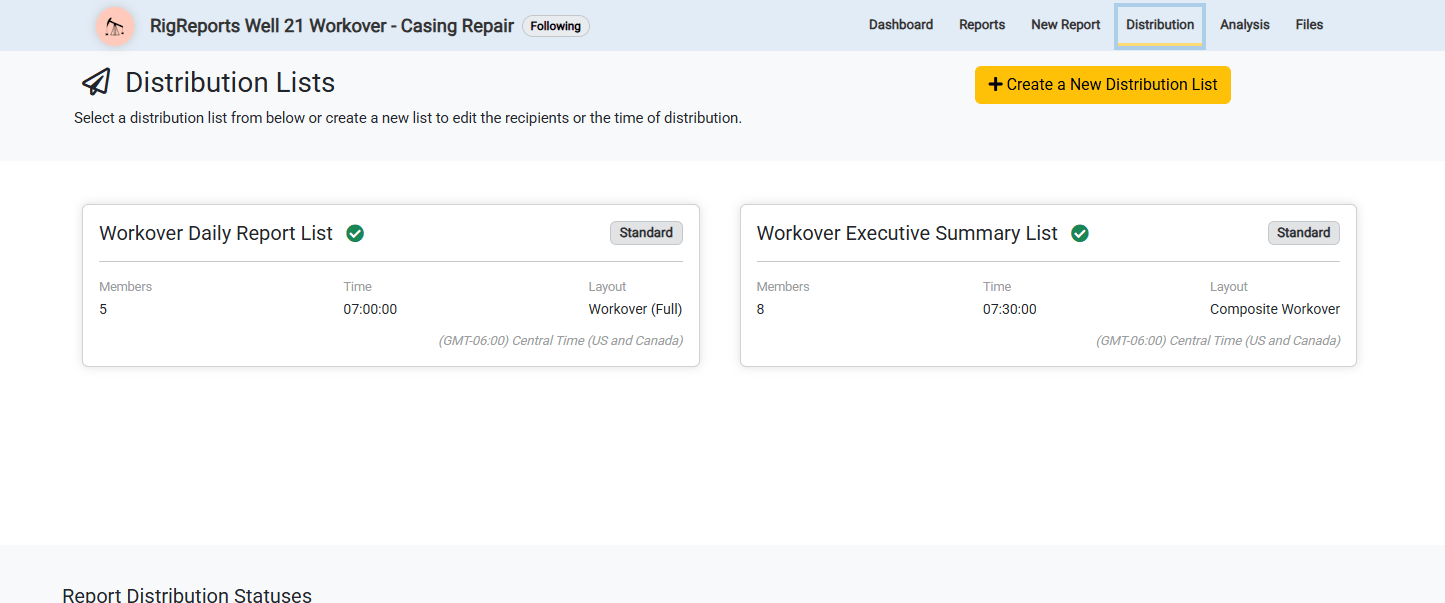
Previously, every new job was seeded with a single distribution list with the job creator as its only recipient. Any other recipients had to be added by hand on every job. Default Distribution Lists solves this. Administrators can now define the default distribution lists that will be created for each job type, complete with recipients, send time, and report layout. When a new job is created, the active default distribution lists for that job type are shown to the creator with the option toggle off lists they do not want at that time. Once the job is created, the selected default lists live and ready to start distributing reports. Editing or deleting a list later never affects jobs that already used it — each job gets its own independent copy.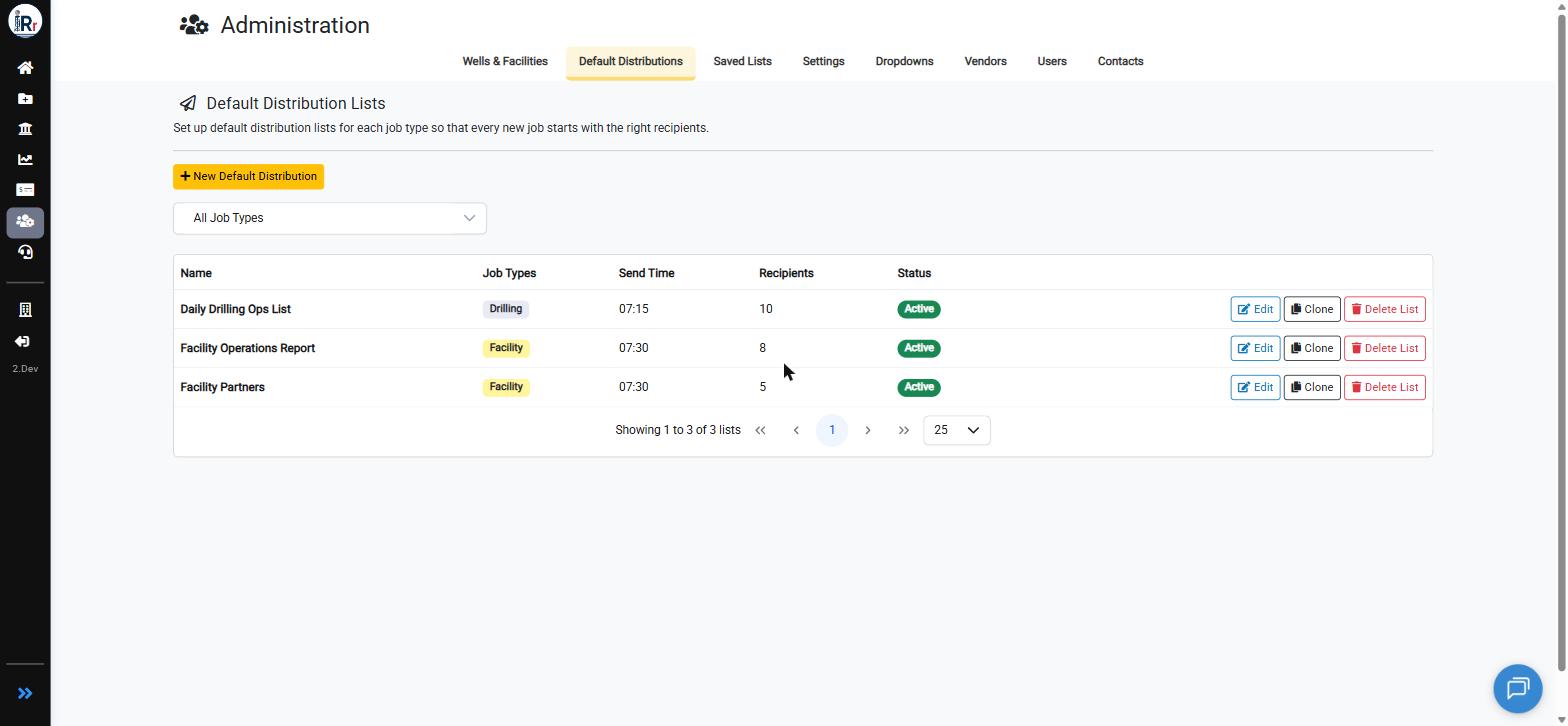
Setting Up a Default Distribution List
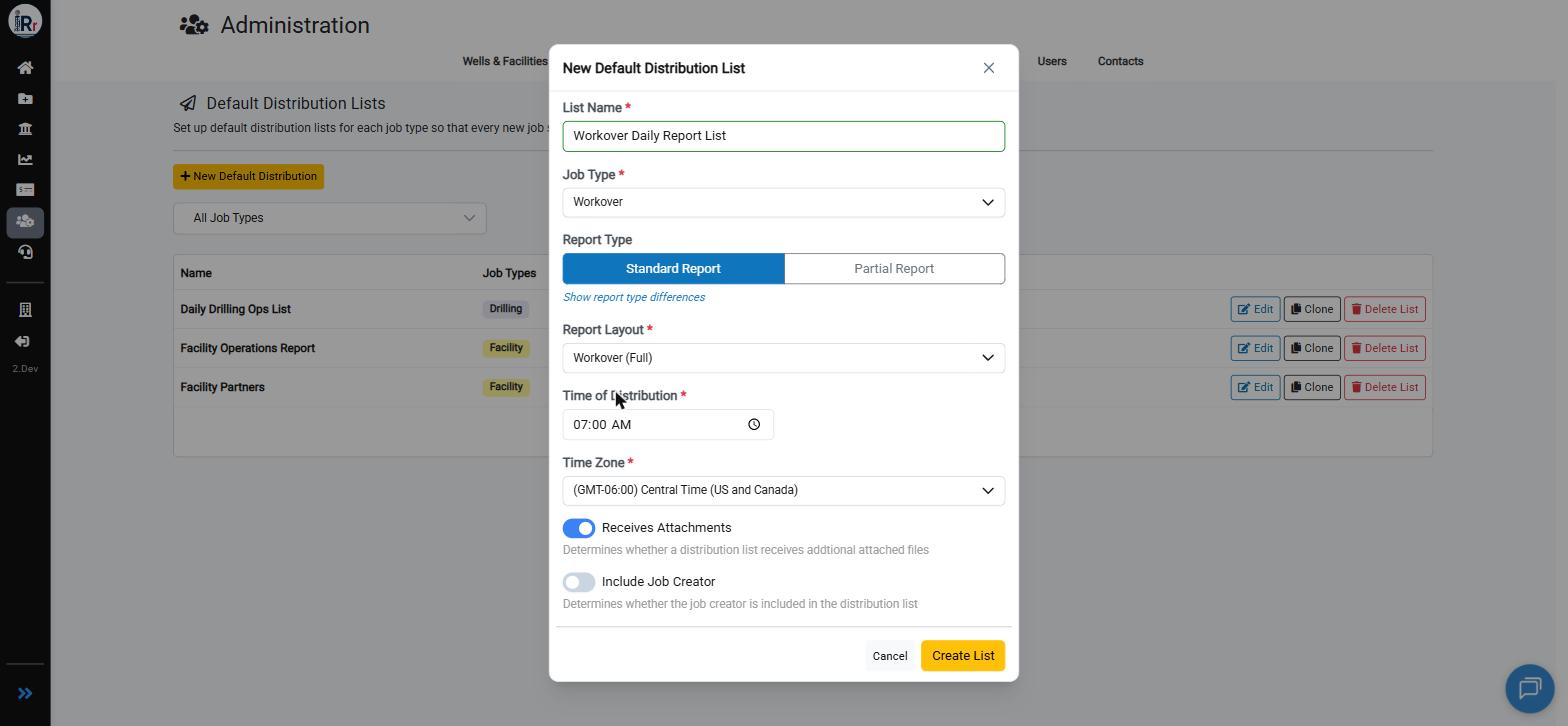
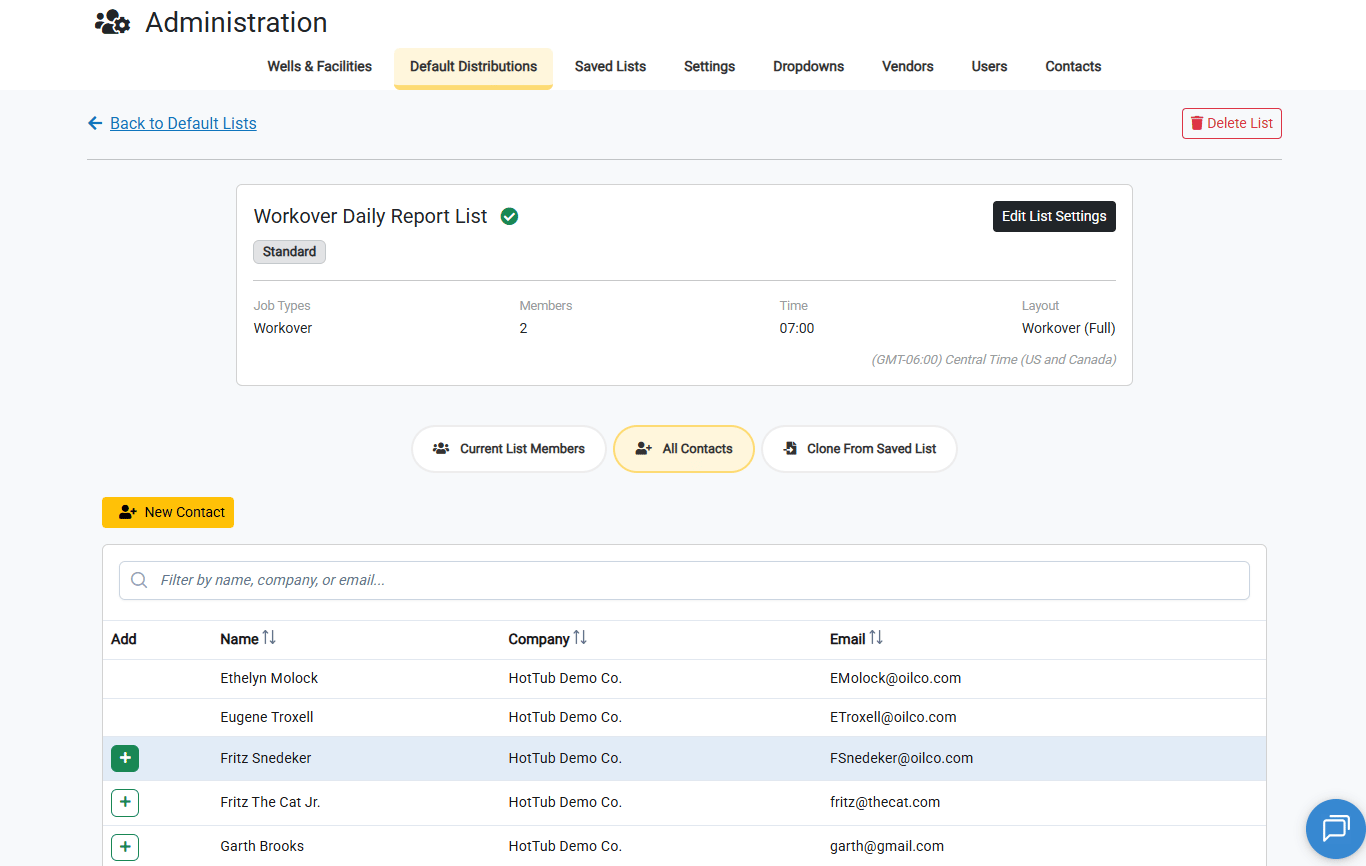
Lists are managed from the Default Distributions tab under Administration (only accessible to Administrators). Click New Default Distribution, choose the job type the list should apply to, and configure the send time, time zone, report layout, and whether the list receives attachments or includes the job creator.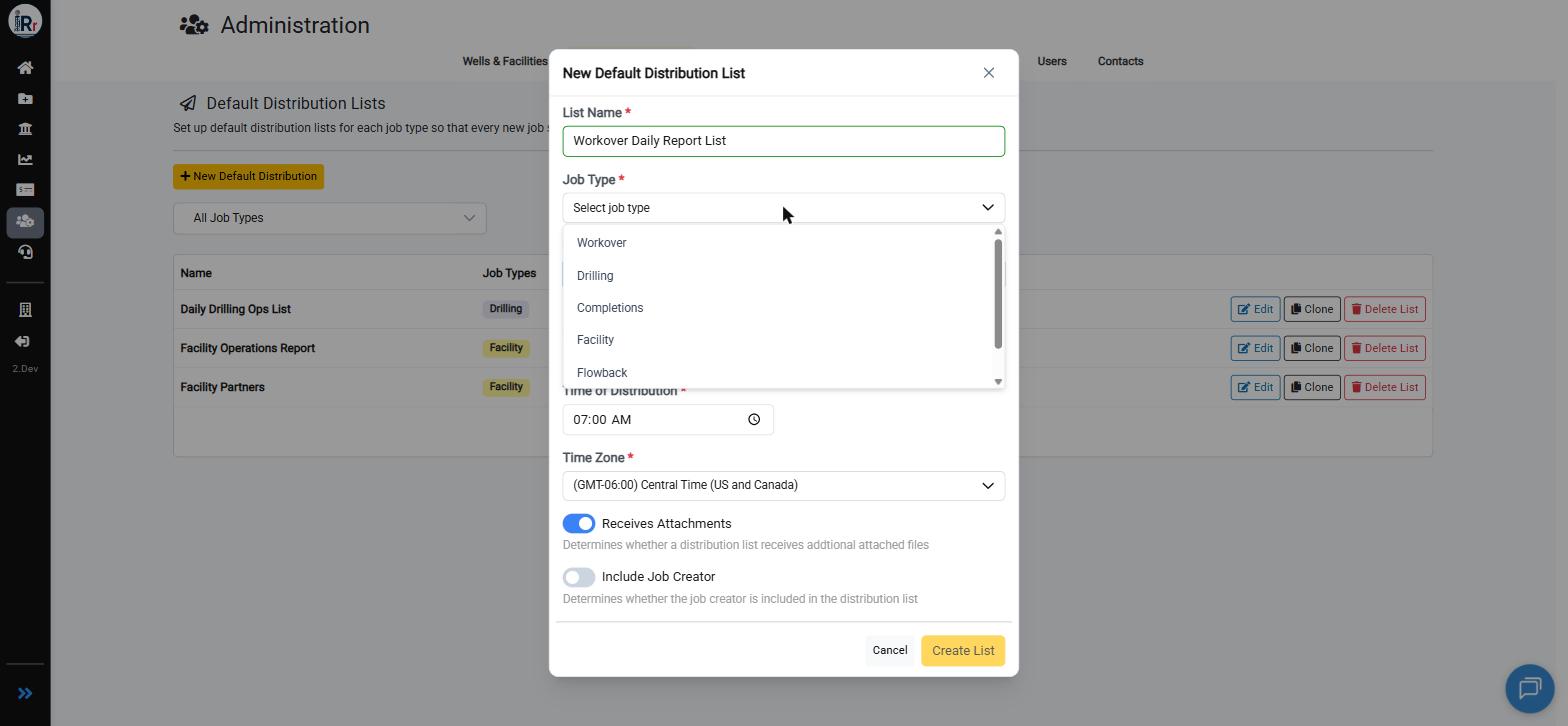
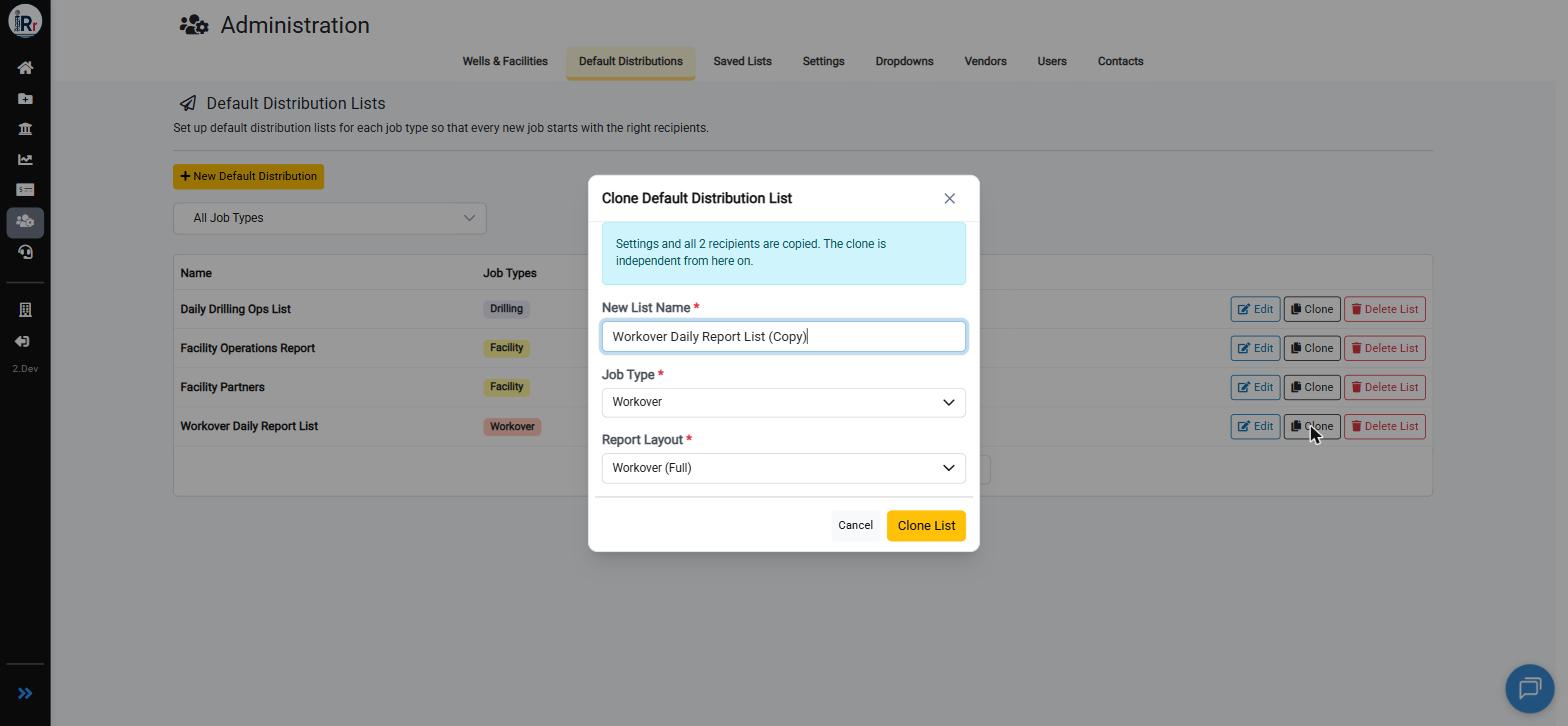
Editing and Cloning Default Distribution Lists
Settings for an existing list — job type, report layout, send time, and status — can be updated at any time from the Edit List Settings button on the list’s detail page.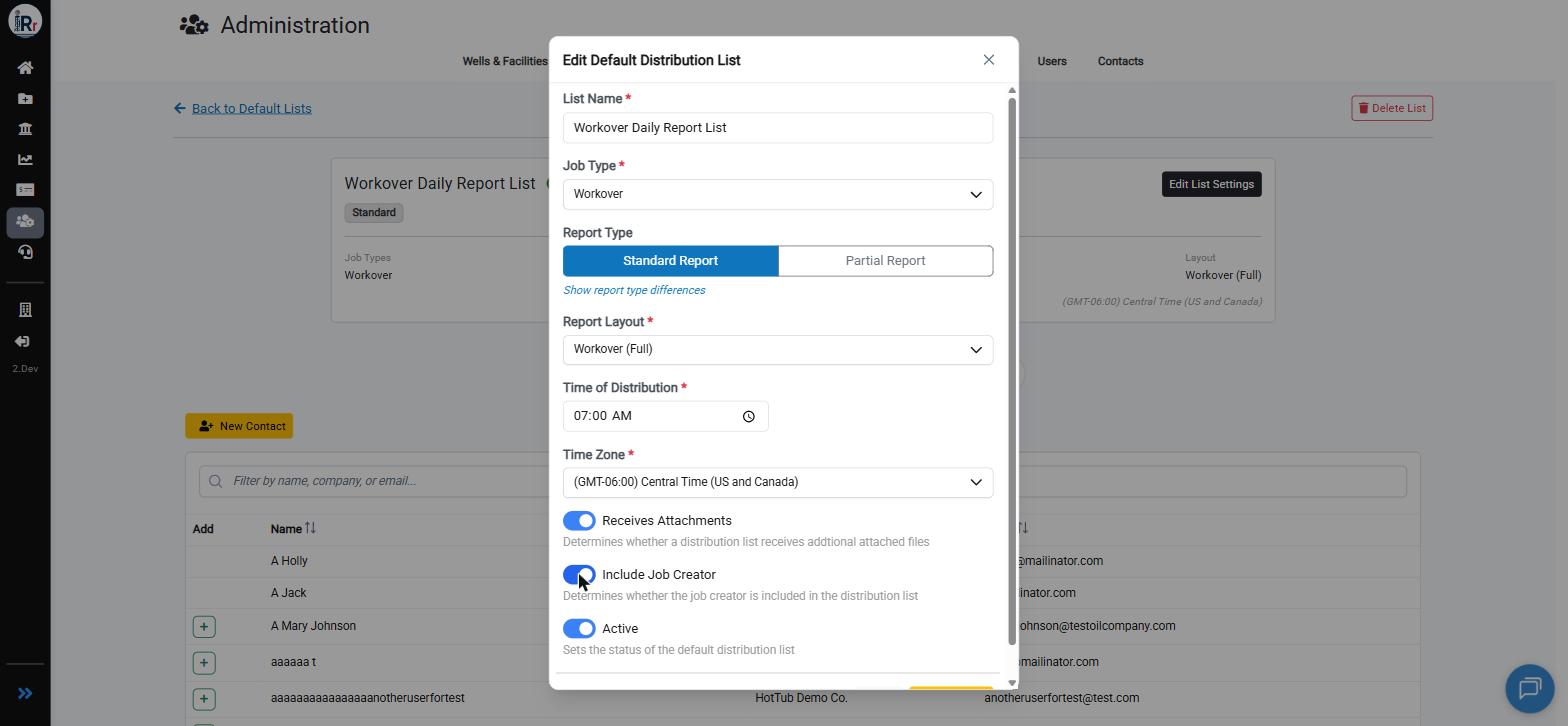
Applying Lists When Creating a Job
The Create Job stepper now includes a Distributions step. As soon as a job type is selected, every active default distribution list configured for that job type appears here as a toggle, pre-selected by default. Toggle off any list you don’t want created for this job.