
Release Notes - [05/19/2026]
🚀 New Features- Casing Tally import is now available
- Cost Attachments
Casing Tally Import
A long requested feature, Casing Tallies can now be imported using our downloadable template. This allows you to quickly populate casing tally data in bulk rather than entering each record manually.Downloading the Template
To get started, navigate to the Casing tab and locate the casing string you want to add a tally for. If no tally has been imported yet, you will see a “Casing tally not imported” prompt with an Import Casing Tally button.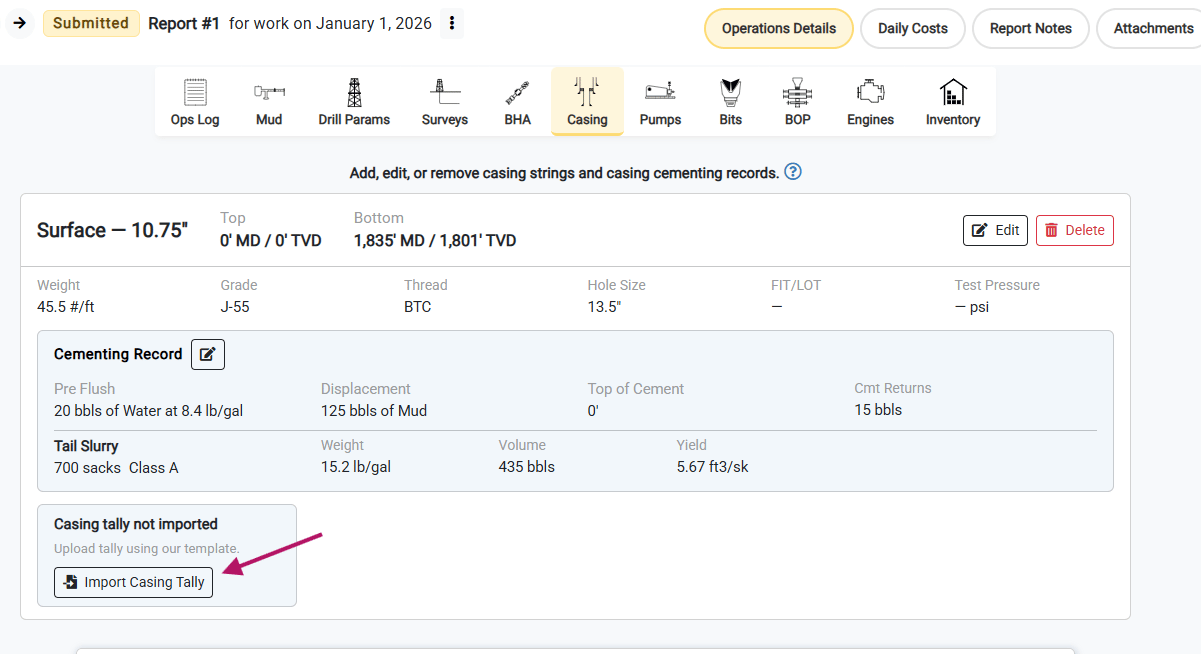
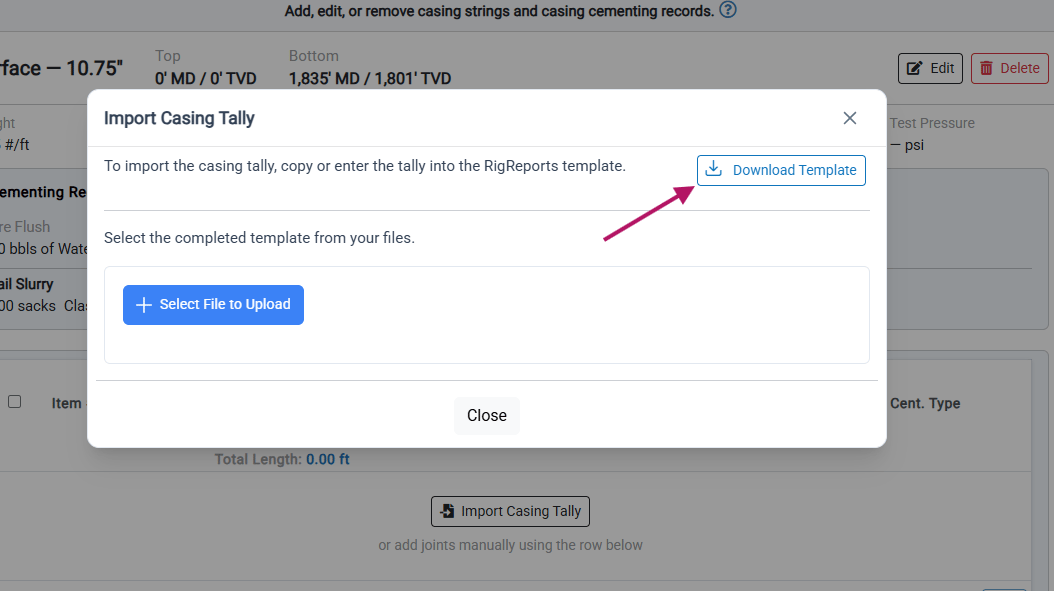
If a joint should be excluded from the tally (e.g. bad threads), Enter “Y” in the Exclude From Run column.
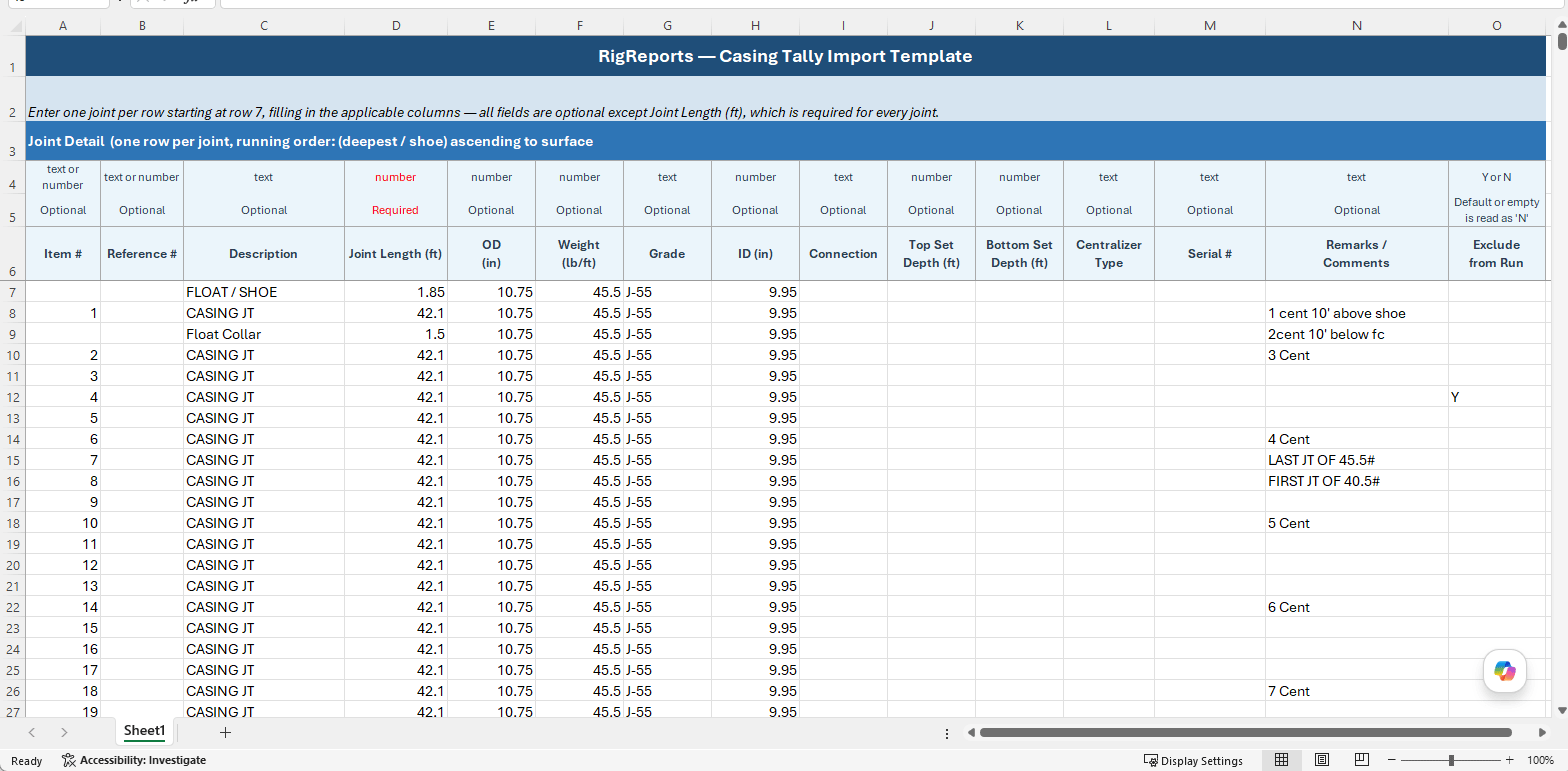
Importing the Template
Once your template is complete, return to the Import Casing Tally dialog and click Select File to Upload to choose your completed file. The data will be validated and loaded into the report.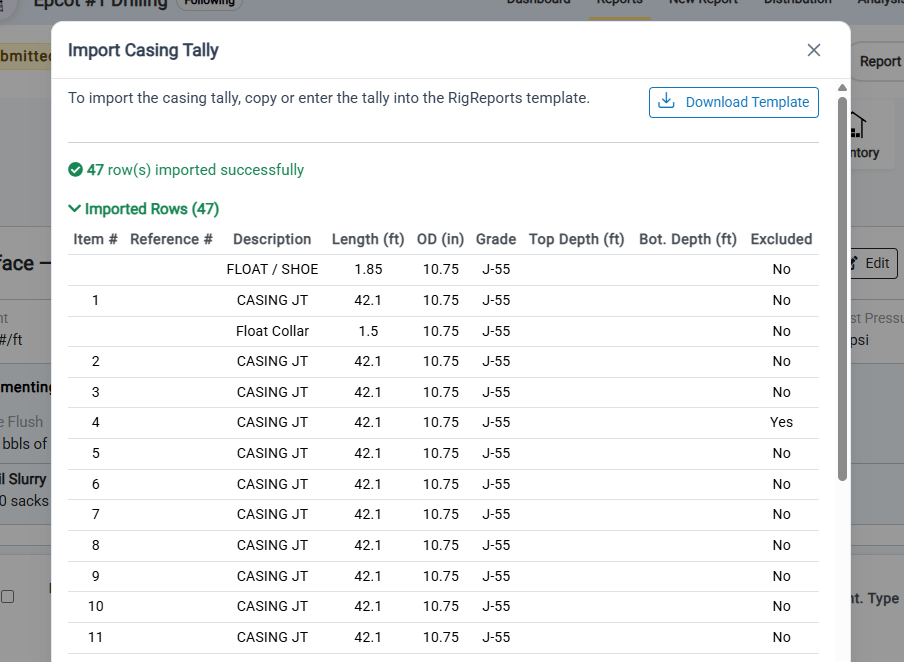
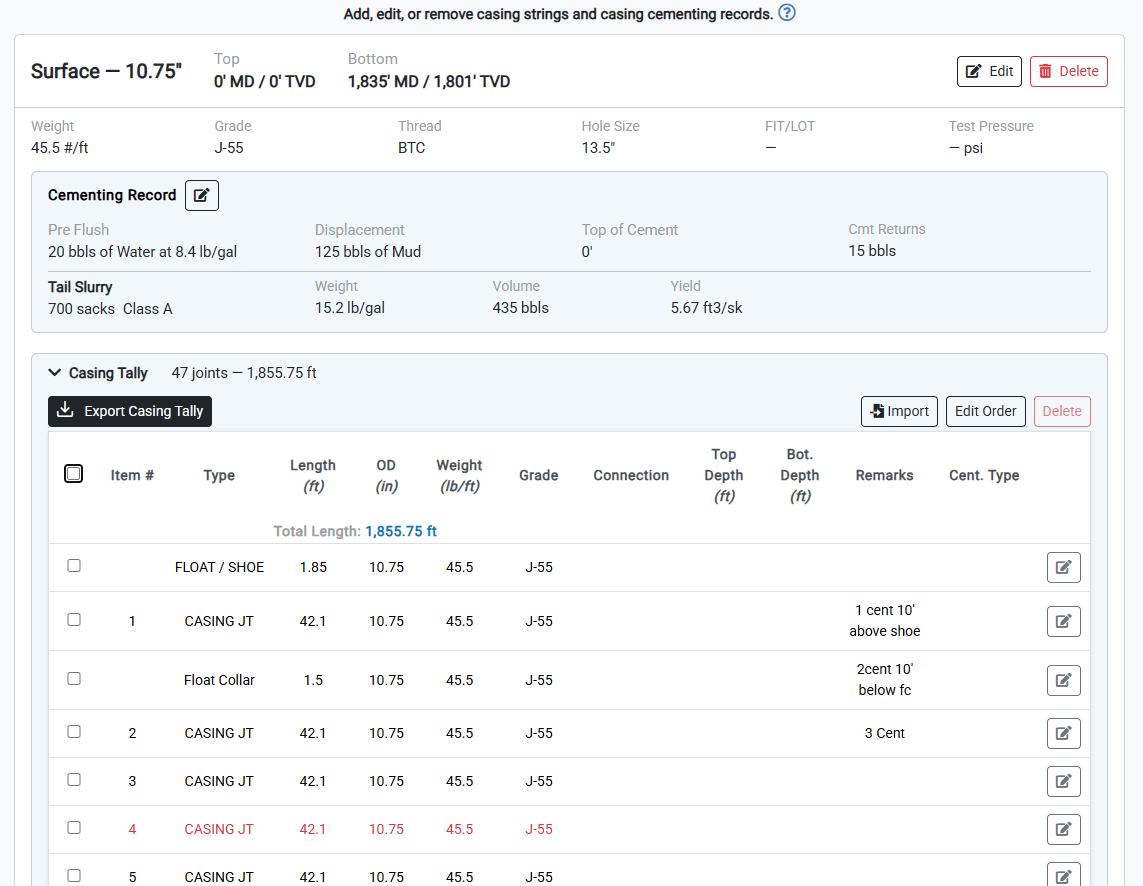
Ensure that all required columns in the template are filled out correctly before importing. Rows with missing or invalid data may be skipped during the import.
Exporting the Casing Tally
You can also export an existing casing tally at any time. Click the Export Casing Tally button at the top of the tally section. Select your preferred format (xlsx or pdf) and click Export to download the file.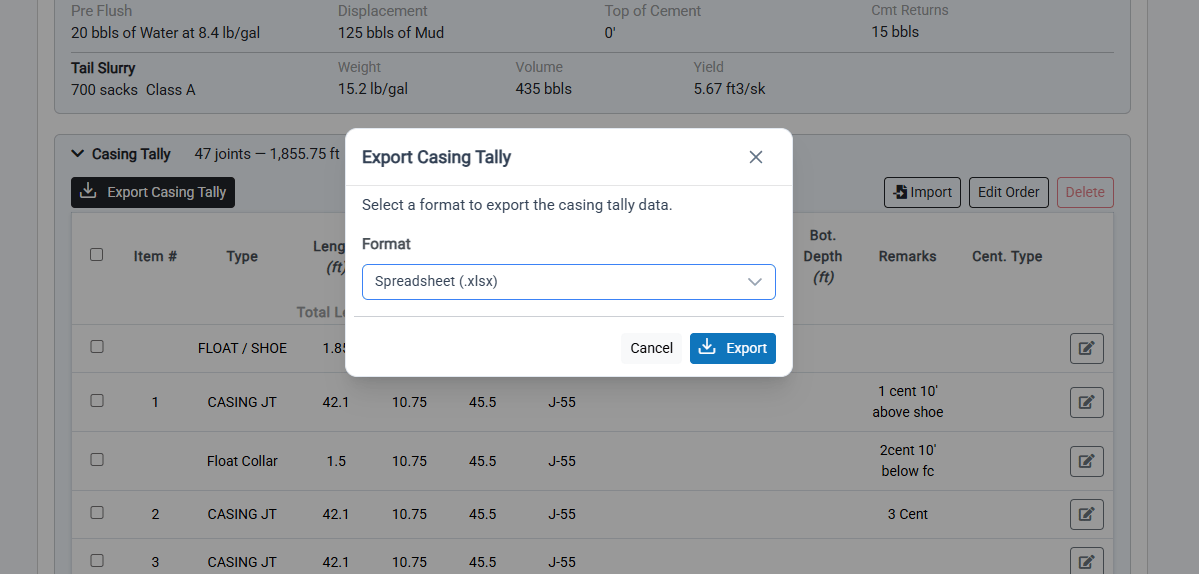
Cost Attachments
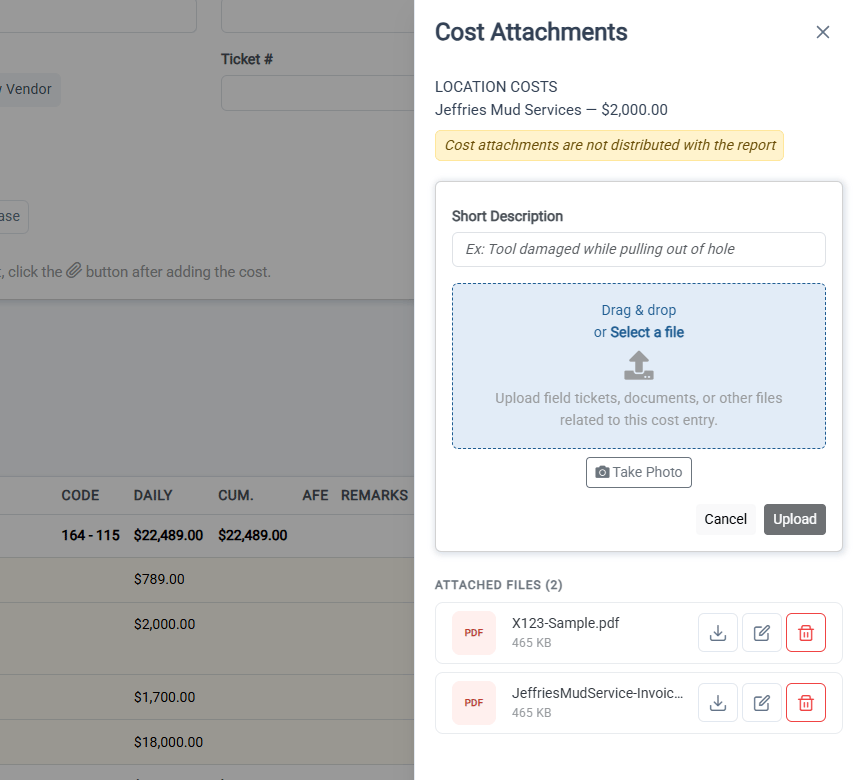
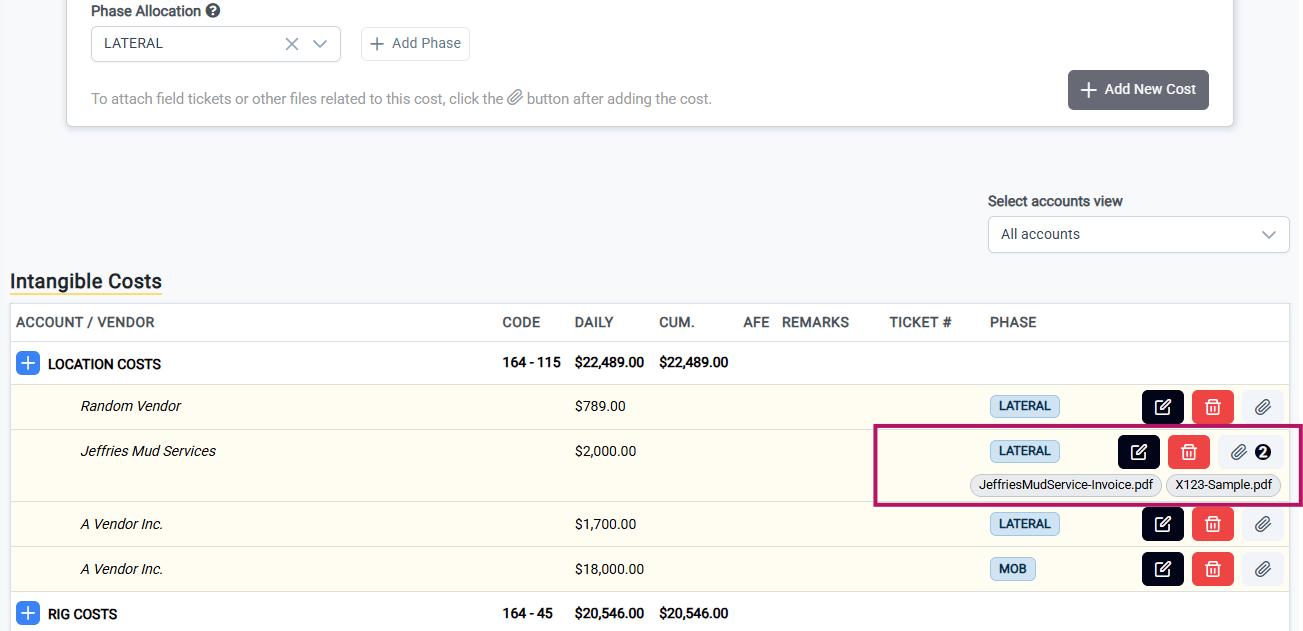
Attachments can now be uploaded directly to daily cost entries. This makes it easy to associate supporting documents — such as field tickets, invoices, or receipts — with the corresponding cost record.Uploading an Attachment
Each cost entry row now includes a paperclip icon on the right side. Click the paperclip icon next to the cost entry you want to attach a file to.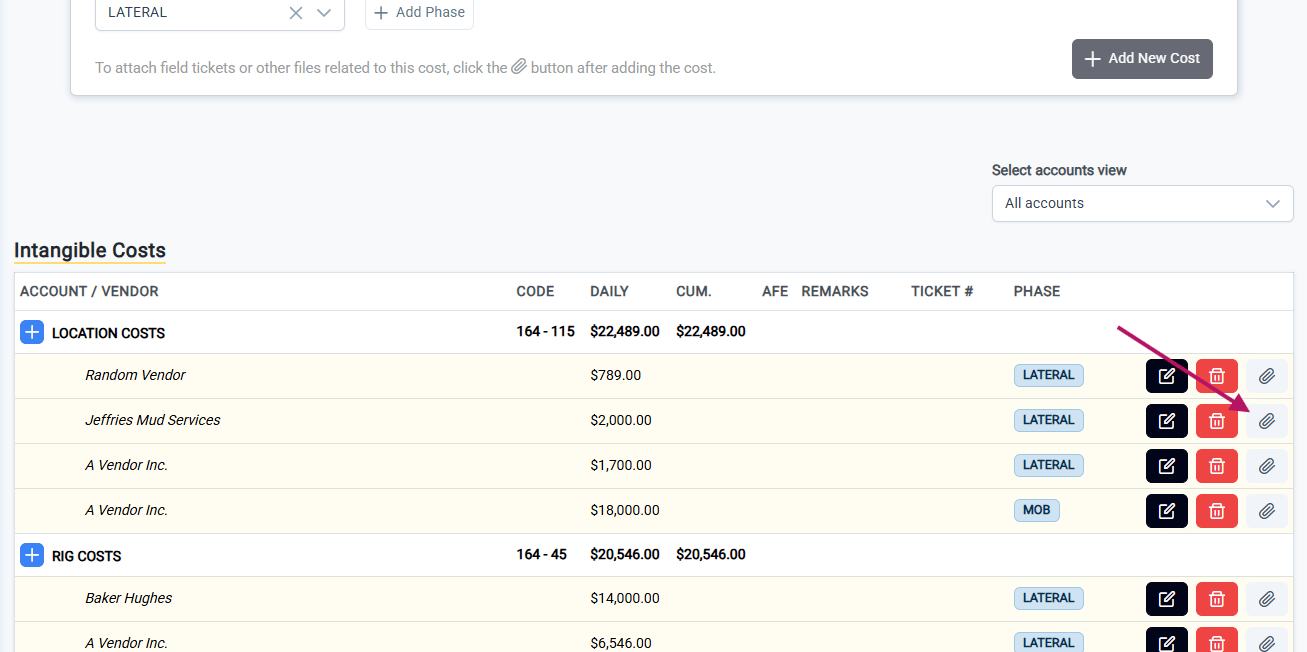
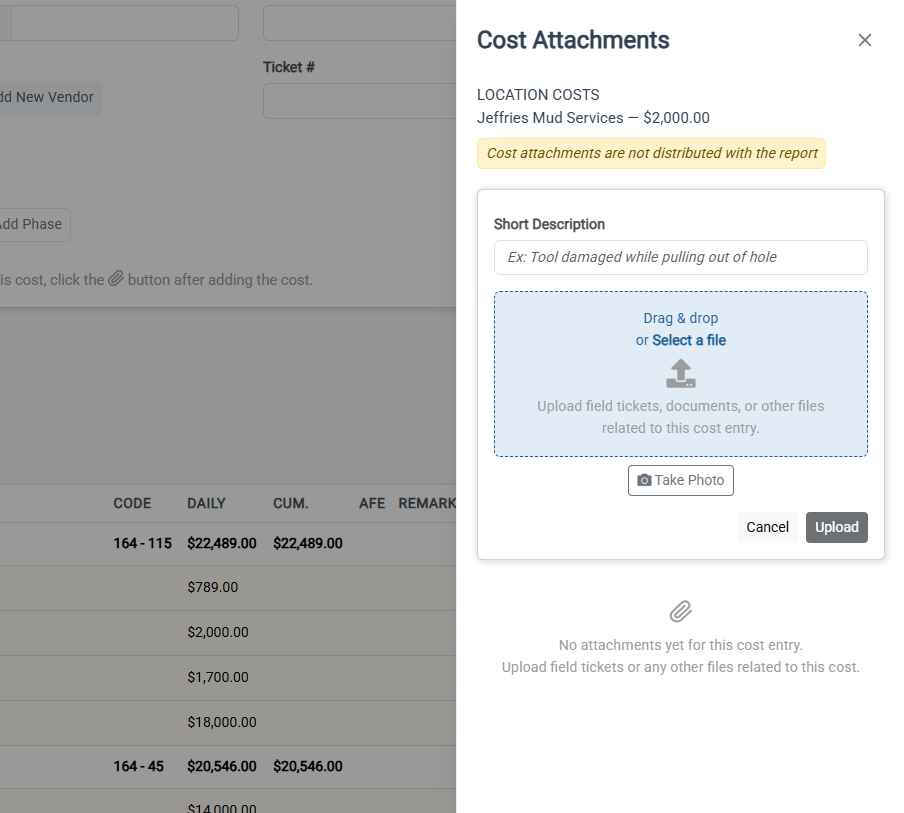
Cost attachments are not distributed with the report. They are stored securely and are accessible only to users with permission to view the job’s cost data.
Viewing Attachments
Once files have been uploaded, they appear in the Attached Files list at the bottom of the Cost Attachments panel. Each file can be downloaded, opened, or deleted from this list.